Reading Time: 12 minutes
Any water crossing deeper than knee height is potentially dangerous. It needs to be planned for, the group needs to be appropriately prepared and equipped, and the river carefully assessed and crossed with great care only if it is safe to do so.
A dangerous river crossing must not be attempted.
Plan for river crossings
When planning a trip, the nature of any river crossings and the water levels that might be expected at that time of year should be checked in guidebooks or the website of the land manager, while bearing in mind the skills, experience and equipment of the group undertaking the trip.
A small group of experienced walkers who are confident in water and can swim is entirely different to a group that includes novice walkers, children or non-swimmers.
Solo walkers have no-one to assist. Self-rescue is the only option in the event of a slip or fall.
River crossings on established tracks may be:
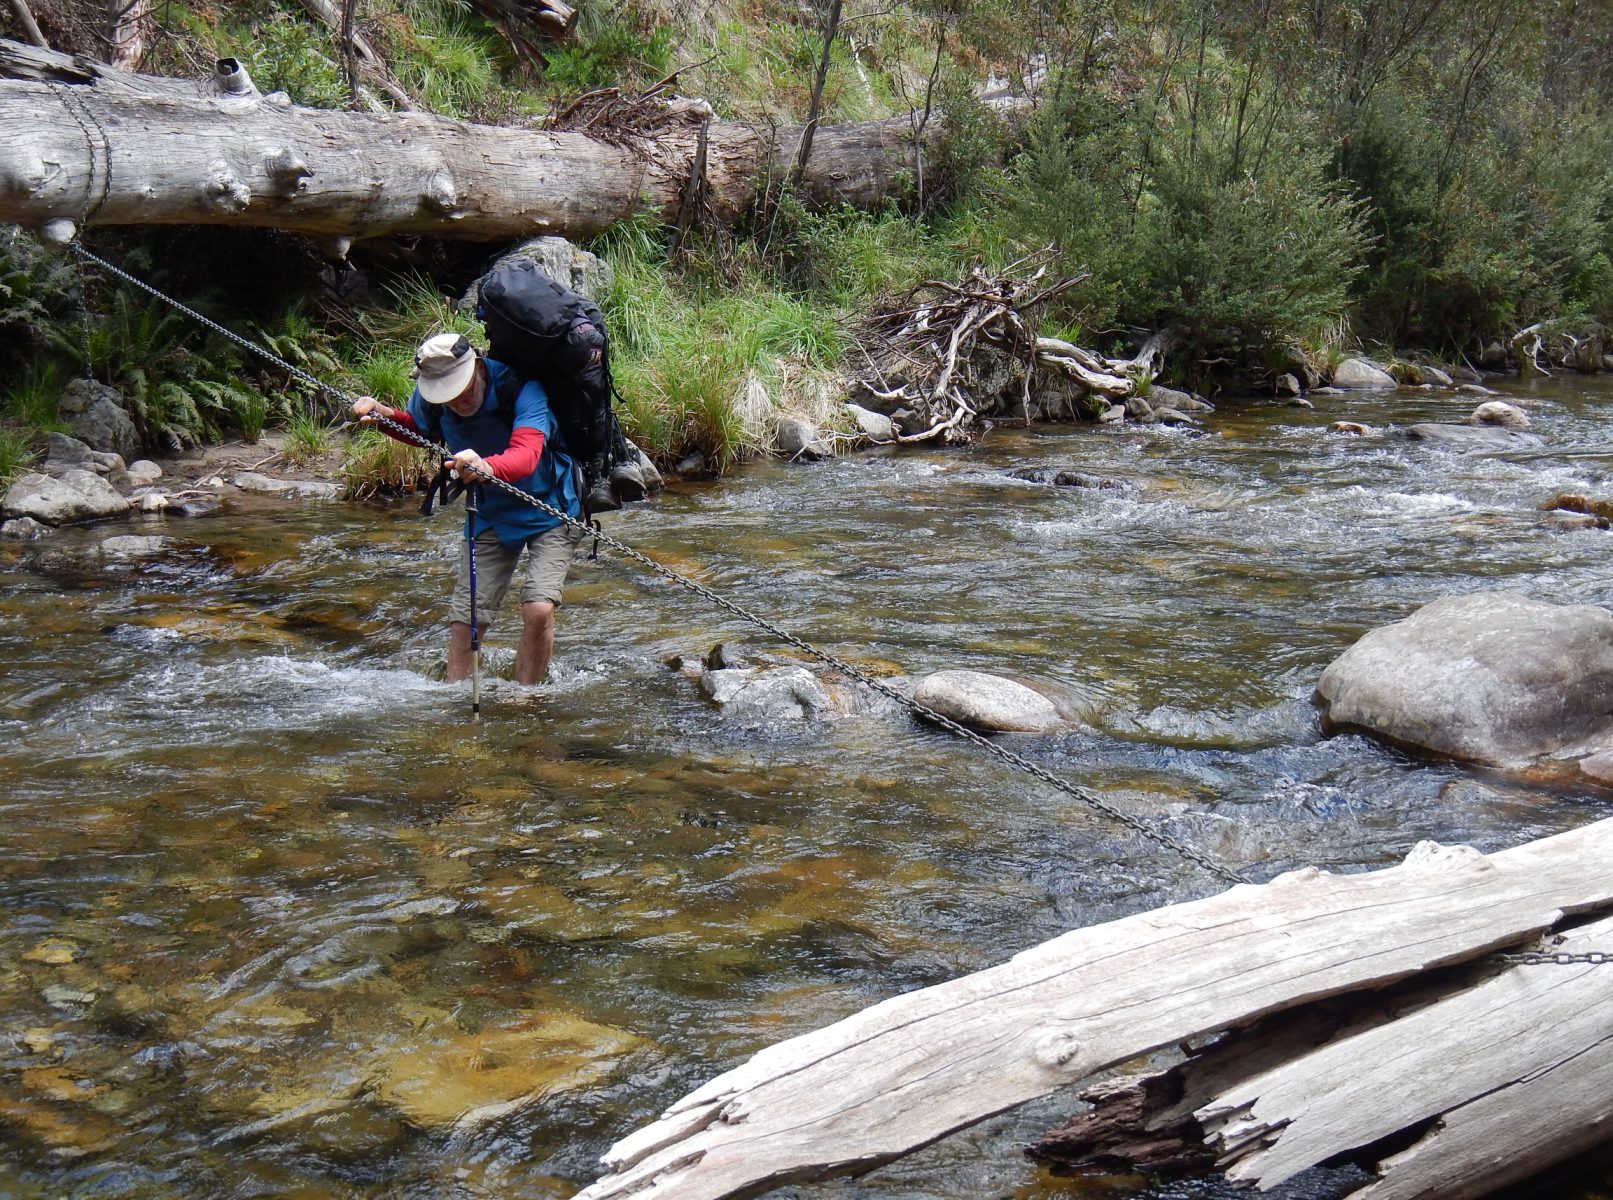
- A well-defined ford, where the river can be waded. Some locations may have a suspended overhead chain to assist.
- A foot bridge or log bridge.
- A rowboat or canoe. At a few locations a small boat is provided on each bank.
Additional considerations may include:
- On a coastal walk, river estuary crossings are affected by tides, high seas and changes in sand banks and the river outlet to the sea.
- Periodic hydro or irrigation water releases from an upstream dam will cause rapid water level changes.
- High water levels due to a wet season or flash flooding as a result of a storm in the river catchment.
- In northern Australia where crocodiles are a possibility, only cross at a bridge or a safe ford indicated by signage. See Crocodiles.
Group members need to be aware that the trip involves river crossings, and:
- Be sufficiently capable and confident to undertake them.
- Be equipped with a good quality pack liner and waterproof stuff sacks or dry bags. (Plastic bags are too easily damaged over the course of a trip.)
- Have alternative footwear such as runners or sandals with a heel strap as an option to avoid wet boots.
- Carry additional food in case a high river level requires waiting or a change of route.
Immediately prior to the trip
Check current information about river levels and the planned crossing points and infrastructure. River levels may be high due to a wet season, recent storms or snow melt. A bridge may be damaged or the crossing point may be altered due to floods, storms or bushfires.
Assessing a river crossing
To cross or not?
It depends. An experienced group, aware of their capabilities will carefully consider the circumstances and make decisions about: wear pack/float pack, waist belt done up/undone, boots on/boots off, which group crossing method, camp/walk the long way around/take another route.
For less experienced groups; novices, children, non swimmers, faced with current, pressure waves, snags, opaque water, rough bottom, limited runout, there is only one response: DO NOT ATTEMPT THE CROSSING.
The river
On an off-track route, identify a safe river crossing point by carefully checking each of the factors listed below.
On an established walking track, the river crossing point will usually be marked and obvious, but do not assume the crossing is safe. A careful check is still required. For example, the river level may be high due to recent rains, the crossing point may have changed due to recent floods, or a fallen tree may have affected the river flow and created a dangerous trap.
- Current and depth: will vary across the width of the river and need to be considered in combination. A strong current (greater than walking pace) in ankle deep water may be acceptable, but the same current at waist depth will be too dangerous. A depth above knee height of the shortest member is dangerous in anything other than a gentle current.
- Width: of the crossing is related to the current and depth. It is easier and safer to wade across a wide shallow pool with a gentle current than to cross a deep narrow channel with a strong current. However, a wide crossing has its own risks. The best route across will be harder to determine. Individuals may take different routes and perhaps stray into difficulties. The distance from the bank makes it slower to provide assistance if required.
- Downstream hazards: What are the consequences of someone losing their footing? Are there any logs, snags, cascades or rapids downstream?
- Accessible entry and exit points: The exit point should be downstream of the entry point.
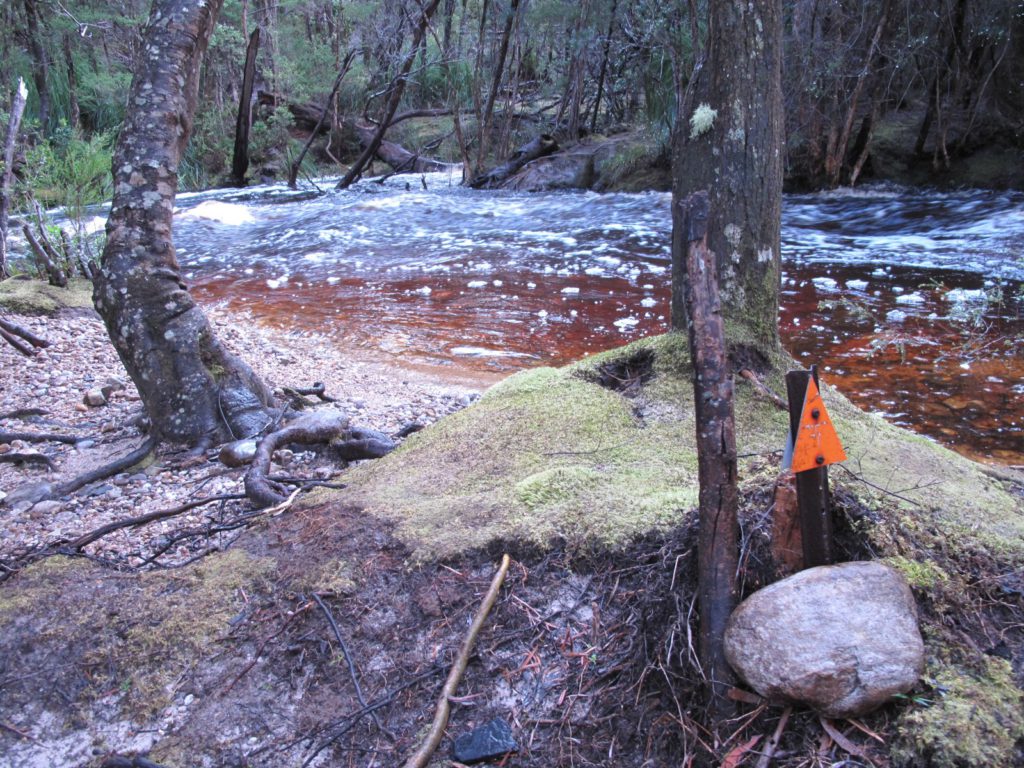
- Stream bed: A visible and firm bottom free of snags, logs, boulders, slippery rock slabs or entrapment points. Note: In South West Tasmania and some other locations, tannin in the water can prevent the bottom of a river or estuary being visible. The nature of the banks can give a good indication of what the bottom will be like, but careful feeling with the feet at each step and probing in front with a wading pole is necessary.
DO NOT CROSS IF:
- The current is stronger than walking pace and the depth greater than knee height.
- The current or water level is changing, or is likely to change while crossing. This may be due to tidal flows, wave surges, heavy rain or storms, or upstream water releases.
- The water is carrying debris, turbulent or muddy.
- There is no access downstream if a rescue is necessary.
- There are dangerous water hazards present, either at the crossing or downstream e.g.:
- Stopper-wave: a very strong current flowing over an obstruction, such as a boulder or log. A person can be trapped in a stopper. Escaping from it is difficult.
- Strainer: fixed object that the current passes through, typically a fallen tree with branches. A person can be pinned against the strainer on the upstream side and be unable to move.
- Eddy: a section of a river which swirls around. A person can be trapped in the whirlpool.
- The location is in northern Australia, where saltwater and freshwater crocodiles pose a significant risk. See Crocodiles.
If in any doubt that every member of the group can cross safely, do not cross.
Set up camp and wait if water levels are expected to drop, take an alternative route or turn back.
Preparing for a river crossing
- Ensure sleeping bag, spare clothes and food are in dry bags or stuff sacks and they have been closed to make them watertight
- Put items such as mobile phone, camera, loose items on the outside of packs and from the outside pockets inside the pack
- Close the pack liner securely.
- The feet must be protected. Boots must be worn for crossings where the river bed is rocky or cannot be seen clearly. Alternative footwear (runners or sandals with a heel strap) is acceptable if the river has a clear sandy bottom and there are no downstream hazards.
- If using walking poles, adjust them to maximum length and ensure locks are firm. Otherwise, fold them up and stow them.
Pack waist belt and sternum straps – Done up or not?
Done up – It helps balance if walking in shallower water with a rough bottom. In water over waist-deep prevents the wearer’s head being pushed forward into the water by the pack floating up.
Undone – The pack can be taken off quickly in the event of a stumble on a rough bottom. In deeper water the pack can more easily be taken off so as to swim.
Buckles undone on waist band and sternum strap is generally the safer option.
Crossing the river
Some methods for crossing in a small group to provide mutual support are described below.
- Walking poles or a stout stick are very useful, if available, to provide an additional point of contact with the bottom. Only move one point of contact at a time.
- At least one capable group member crosses first to confirm the crossing is safe and then identify and assist at the exit point.
- Remind individuals to keep side-on to the current, take short steps and move slowly.
- Capable members can ferry packs and return any poles or sticks for use by others if necessary.
- At least one experienced member crosses last.
River crossing methods
Individual without aid
Up to knee deep, gentle current, obstruction free river bed.
It is possible to cross individually if the current is not too fast nor the water too deep. Knee height is usually the limit if the current is at walking pace. This should only be attempted in the most basic of crossings. It involves choosing a clear route at 45° to the current. Move into the current and walk across and downstream, side on to the current. This prevents the legs buckling at the knee. Small steps and sure foot placements are required for this method.
Individual with a stout stick or walking pole
Up to waist deep, gentle current, rougher river bed.

If stability is required a stout stick may be used. The stick should be of sound timber, about 2m long. Take a route across the stream at 90° to the bank. The stick should be held on the upstream side and pressed against the bottom for stability. Walk forward using the stick for support.
A walking pole can be used in the same way in shallower crossings.
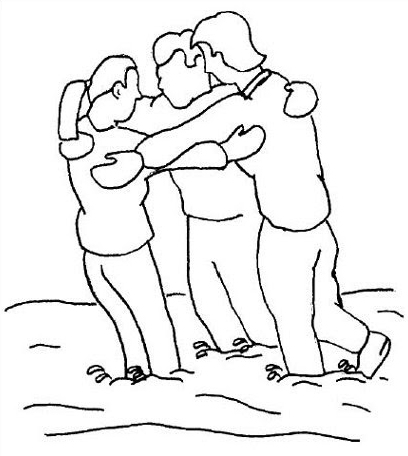
Triangle of support
Stronger currents, river bed has obstructions.
Three people link arms to form a triangle and move together supporting each other, taking it in turns to step through any difficult sections.
Line astern
Three or more people stand in line one behind the other facing upstream into the current and support each other as they cross.
Line abreast using a sturdy pole (recommended)
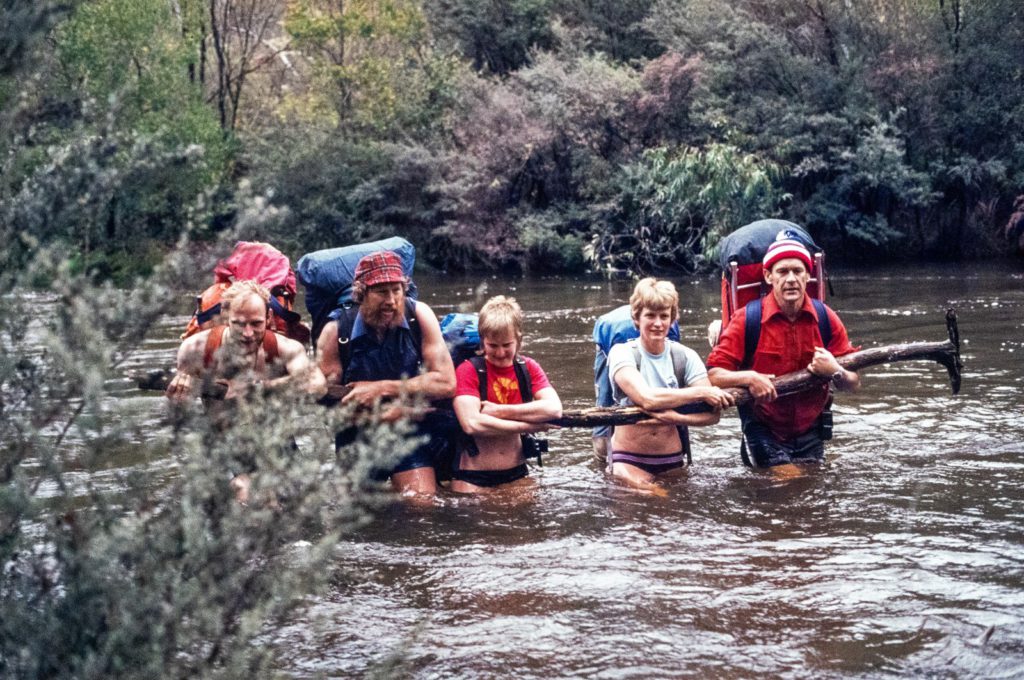
- Three or more persons stand in a line, parallel to the river bank with arms interlocked around a long sturdy pole.
- Everyone moves together, giving each other support, with the strongest person on the upstream end.
A limiting factor in this technique is that a long, straight, sound tree branch is required.
Crossing a deep pool or lagoon

This type of crossing is for experienced bushwalkers who are confident and experienced in water and can swim. It is not suitable if the water is very cold.
On an off-track trip the best spot to cross a river can be a deep pool with minimal current. On a coastal walk, where rivers or large creeks need to be crossed,there can be a lagoon or large pool upstream from the river mouth or an estuary that provides a good crossing point that may be wide and deep, but with minimal current.
- The crossing point needs to be carefully checked for hazards, accessible entry and exit points, etc.
- Wear no clothes, minimal close fitting clothing or swimwear.
- Use footwear to protect the feet. Runners or sandals should be carried if this type of crossing is expected as it is difficult to swim wearing boots.
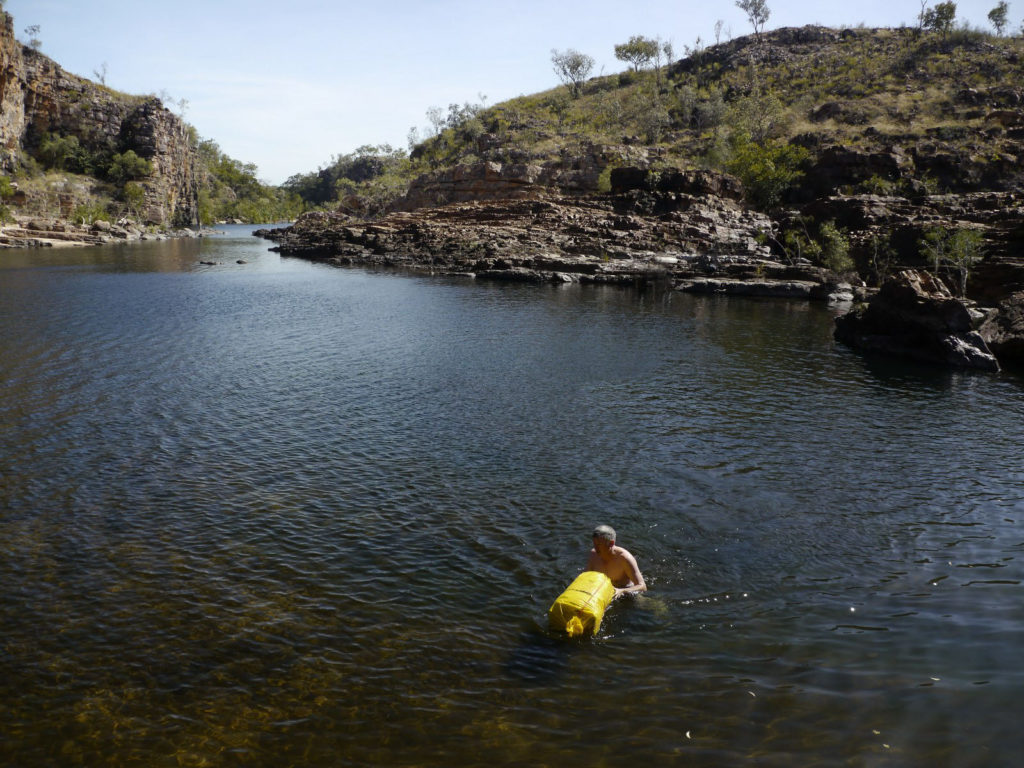
For a deep crossing, (more than waist deep), a significant problem arises: a fully loaded pack may seem heavy, but it floats like a cork.
As the wading depth increases past waist height, a pack worn on the back will start to float, pushing the wearer’s head forward. This is uncomfortable, disconcerting and can unexpectedly throw someone off balance.
In chest deep water it is impossible to continue wearing a pack as the wearer’s face is forced forward into the water.
The solution is to swim across with the pack.
Steps are:
- Prepare the pack to ensure contents are well sealed.
- A pack liner is essential for any trip involving river crossings.
- Use dry-sacs for critical items; sleeping bag, clothes, food, camera, phone.
- Attach a lanyard with a wrist loop.
- If the crossing is a swim all the way, a garbage bag or lightweight tarp on the outside is a good additional waterproof layer.
- As the water deepens, float the pack in front. Use the lanyard and wrist loop to ensure the pack cannot float away.
- When the water depth is such that wading isn’t possible, use the pack like a swimming pool kickboard and swim behind it.
On a warm summer’s day, this can be fun.
But a lot can go wrong:
- The pack sinks lower into the water. A disconcerting experience as it is obvious that the pack liner is leaking and the precious contents are soaking up water.
- There is more current than expected. The person can be pushed too far down stream, lose hold of the pack and lose it in the current (a serious situation).
If the pool or lagoon is close to a river mouth on the coast:
- A strong current can develop quickly if the tide changes.
- An unusually large wave can surge up into the lagoon, and surge out again.
- A person and/or their pack can end up in the surf and open ocean beyond the river mouth (a very serious situation).
Wading along a river, estuary or lagoon
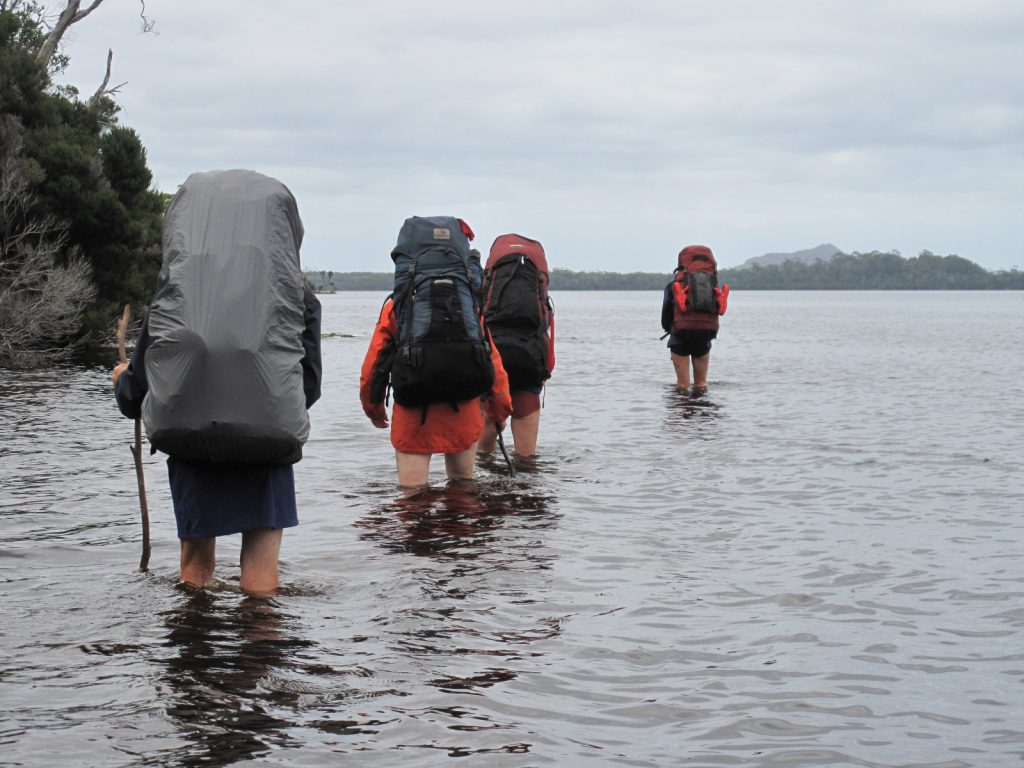
When off-track walking, particularly in south eastern Australia, the best or only feasible route may be in the water along a creek, river or the side of an estuary or lagoon, to avoid thick scrub or impassable cliff lines and bluffs. This involves what may be prolonged wading and sometimes swimming.
An estuary, river or creek that is suitable as a wading route will have minimal or no current if it is more than knee deep. If the current is likely to change, for example due to a tidal change, or a large side creek entering, the group needs to be alert for the change of conditions and reassess the route.
Some of these types of routes are documented in guidebooks and blogs, which may provide specific information, such as deep sections or waterfalls that need to be bypassed.
Wading along a river or estuary is potentially dangerous.
Difficulties and challenges include:
- A deep channel usually occurs on the outside of each river bend, often with a stronger current. There may also be cliffs along the bank. It may be necessary to repeatedly cross the river to stay on the easier and shallower sections on the inside of bends. This can require retracing steps to a safe crossing point.
- Side creeks can scour deep channels where they enter. This is a particular problem if wading down an inlet or a lagoon. To avoid a swim it may be necessary to go along the bank of the side creek to find a crossing point. Alternatively, it is sometimes possible to wade round the channel by going further out from the shoreline.
- Cascades or waterfalls. A safe route around such obstacles needs to be found.
- Snags, fallen trees, soft sand, silt or mud, weed beds, floating debris can be at best unpleasant and at worst very challenging and dangerous to negotiate.
- If the wading is deeper than thigh depth, even a well-sealed pack will leak if it is in the water long enough.
- The pack waist and sternum straps: done up or undone? Done up – it helps balance if walking in shallower water with a rough bottom and in over waist-deep water prevents the wearer’s head being pushed forward into the water by the pack floating up. Undone – the pack can be taken off quickly in the event of a stumble on a rough bottom or getting into deeper water and needing to take the pack off quickly so as to swim. Undone is generally best.
The same cautions and precautions listed above for crossing a river apply, with the additional factor that conditions will change as the group progresses. Hence a constant assessment of the feasibility and safety of the route ahead is required.
An experienced and capable group member must be in front to make this assessment.
Any wading routes need to have sufficient and frequent exit points from the water so that the group cannot be trapped in a gorge or at the base of a cliff.
Precautions
- Boots should always be worn. River and estuary beds can be slippery, or have slippery obstacles such as rocks, logs and snags.
- Walking poles or a wading stick is essential for each group member.
- Leaders must be especially vigilant in cool conditions to ensure that a group member does not become hypothermic due to extended periods in water.
- If the water is deep enough for packs to be partially submerged, a regular check should be made to ensure that the contents are not becoming wet due to leaks.
River crossing with a rope
A river crossing that requires a climbing rope and equipment to belay people while they cross is outside the capabilities of most bushwalking groups and beyond the scope of this manual. Specialist knowledge, skill, practice and equipment are required.
Self rescue
If footing is lost while attempting a river crossing, the individual should:
- Remain calm and determine the best course of action
- Assume the white-water safety position – on the back, with legs and feet downstream, and feet and toes out of the water to avoid foot entrapment.
- Watch for obstacles
- Use pack for floatation. If wearing a pack, hook thumbs through the lower part of the shoulder straps and push down. This helps keep the shoulders up in the top of the straps and the head above water.
- Keep feet pointed downstream and use them to fend off contact with rocks or logs.
- Move across the river in deeper water by using hands and feet in a backstroke or side stroke swimming motion.
- Mark the exit location so it can be found by others in the group.
- Avoid foot entrapment in rocks, boulders or logs (a very serious situation).
River crossing in snow-covered areas
Crossing a river or stream in a snow-covered area has additional risks if a group member falls into the water:
- A person in cold water can suffer cold water immersion and quickly lose all feeling and the ability to use their limbs to self rescue.
- Getting wet can lead to hypothermia
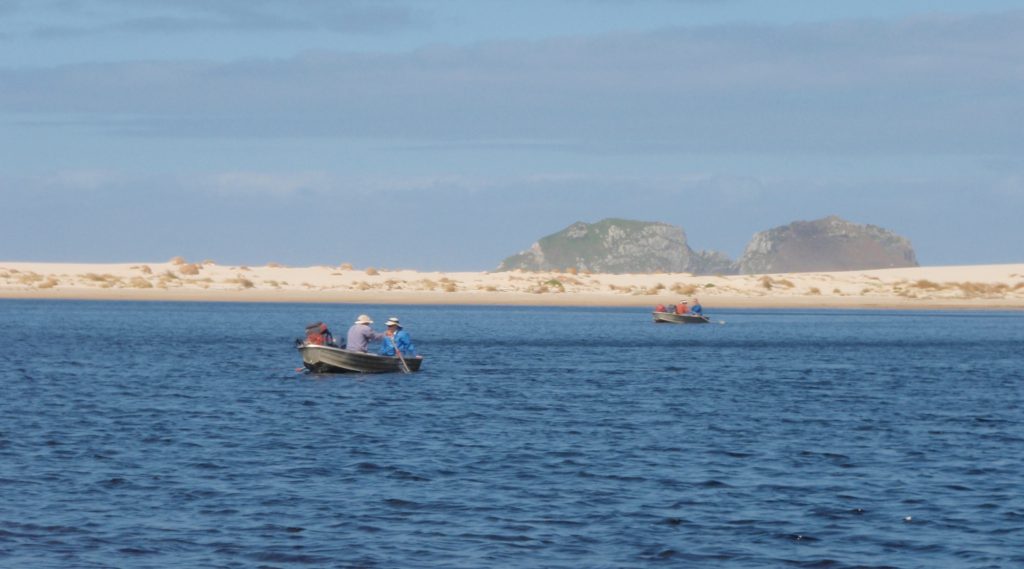
Boat crossings
At a few locations on iconic walks in south west Tasmania, a row boat is provided on either bank to enable the crossing of a lagoon or inlet. On the Bibbulmun Track in Western Australia, canoes are provided at Irwin Inlet.
However, it can be too dangerous to attempt the boat crossing in some conditions, including:
- Strong current due to flood waters or unusual tides.
- Strong winds
- Heavy chop and waves
When it is safe to undertake the crossing:
- Follow the instructions displayed with the boats.
- Do not overload a boat.
- Each group member should cross with their own pack.
- Confirm that each rower can actually row. Crossings are wider than they look.
- Ensure that one boat is left on each bank, in the correct location and well secured.
See also
References and external Links
- River safety – New Zealand
- Hill skills: river crossings – United Kingdom