
Reading Time: 5 minutes
A group may find themselves in a situation where they need to make an emergency shelter for an overnight stay. For example, a group on a day trip may not make it back on time due to an injured group member, a navigation error or adverse weather.
Constructing an emergency shelter can make a cold and wet night out a bit more comfortable and could be a matter of survival in adverse weather conditions. Constructing emergency shelters is a useful skill to practice.
If an unscheduled overnight stop without tents is necessary it is best to make the decision to stop early to provide time and daylight to find the best and safest location for a shelter and to build it.
The type of emergency shelter constructed depends on the weather, local environment and materials available. The task is much simpler if equipment such as a lightweight tarp or bothy shelter is carried by the group.
If a group is waiting for and expecting a rescue the location should be made visible to aircraft and searchers on the ground – a bright coloured clothing item, pack, groundsheet and crossed skis can be used.
Emergency bivouac
A bivouac is a temporary camp without tents or cover. Bushwalkers and ski tourers can construct an emergency bivouac shelter using the methods described below.
If an overnight stop is required and no additional equipment is available:
- Find a suitable sheltered safe location.
- Uses skis, snowshoes or natural materials to provide insulation from the ground
- Put on enough available clothing to keep warm.
- Wear a jacket and overpants.
- An overnight pack (if available) can be emptied and pulled over the feet to provide additional warmth and protection.
Bothy shelter
- Compact emergency shelter that is very quick and easy to set up – highly recommended to be carried on day trips and ski tours.
- A lightweight, waterproof fabric enclosure that group members can sit inside to keep out of the elements. Available in different sizes: 2, 4 and 6 or more person.
- The people inside it provide the structure, there are no poles or guy ropes.
- The combined body heat of the occupants helps warm the air inside.
- Not ideal for sleeping in as occupants sit in it.
Bivouac (bivvy) bag
- A lightweight, waterproof bag that encloses a single person in a sleeping bag.
- Very limited space and condensation can occur.
- Some have hoops to keep fabric off the face.
Lightweight tarp
- A lightweight, waterproof tarp can provide some protection from wind and rain.
Equipment for building an emergency shelter
Depending on the type and location of the trip and the nature of a group, the following emergency equipment can be carried within the group to assist construction of an emergency shelter:
- Ground sheet
- Closed cell foam mats (for insulation)
- Lightweight tarp
- Lightweight cord – 3mm x 10m
- Pruning saw (folding)
- Snow shovel and snow saw (for snow shelters)
- Rubber gloves for building snow shelters (keeping ski gloves dry)
Emergency shelters in the bush
Constructing an emergency shelter can be difficult and time consuming.
Find a good safe location. Rock overhangs, large boulders, large hollow standing tree or log or a large solid log may provide good protection and make it easier to construct a shelter such as a lean-to.
A shelter should be protected from the prevailing weather conditions as much as possible (e.g. on the lee side of a slope out of the wind).
Light a fire near the emergency shelter if possible and safe to do so. Smoke from a fire will help searchers find the location and the fire will provide some warmth.
Additional protection and comfort for a shelter can be provided by using:
- A lightweight tarp or tent fly suspended above or around the shelter to keep rain off and reduce the effect of wind. Cord, sticks, skis and poles can be used to support it.
- Foam mats provide insulation from the ground or snow.
- A groundsheet or emergency blanket can provide some protection from wet ground and snow and can also be used as a “wrap” to keep rain off.
- Leaves, bracken and bark can also be gathered and used to provide some insulation from the ground.
Building a lean-to
If there are no natural features or equipment a lean-to can be constructed if there are natural materials available.
- Find a conveniently low horizontal branch about 1 m above the ground or a large log or tree trunk.
- Lean small logs, branches, foliage or strips of bark against this at an angle of around 45°. The thicker the layer, the more waterproof it will be.
Emergency shelters in the snow
Getting out of the weather into an enclosed, protected space is a priority if a group is forced to stay out overnight without tents.
Choose a sheltered location on a lee slope. Avoid the bottom of a slope where snow may be deposited in large quantities and locations where avalanches or cornice collapse are possible.
It takes time and energy to construct an emergency shelter so consider the following:
- Weather conditions – would it be quicker and easier to descend below the snowline where a bush shelter can be built?
- What is the easiest and most effective snow shelter that can be built in the time available and the snow conditions?
- Equipment and materials that are available to construct the shelter.
- Size of shelter needed and how many people are available to help build it.
Snow pit
A snow pit is fairly quick and easy to build, but not comfortable.
- Select a location where there is enough snow by digging with a shovel or probing with a ski to check the snow depth.
- Dig a trench into a slope with enough room for the group members.
- Form a level platform in the snow from the entrance to the rear of the pit.
- Cover the open top of the trench with a tarp or emergency blanket and secure it with skis, poles and/or snow.
- Skis can also be used to support the roof of the shelter.
- Sit or lie on foam mats, packs or skis to provide some insulation from the snow.
- Clear fresh or windblown snow from the entrance regularly.
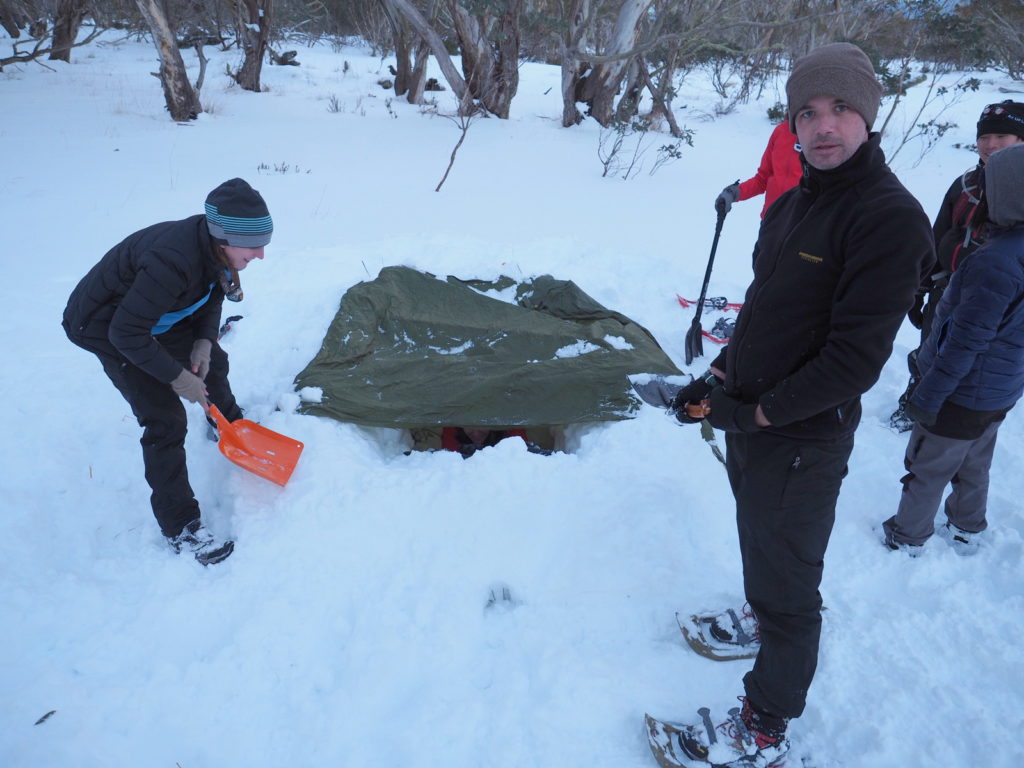
Snow pit emergency shelter
Snow shelter
If time and snow conditions permit, a more substantial shelter can be built
- Dig a trench and use dug out blocks to build side walls, leaving enough space to create a seat.
- Build up walls to about a metre and enclose part of the front too.
- Lay skis and stocks across the top of the walls.
- Cover with a tarp or tent fly and secure with snow.
- Dig the entrance a bit deeper as a trap for cold air.
- The entrance can be sealed with a pack.
- Use foam mats, packs or skis to provide insulation on the seat and under feet.
Summary of emergency shelters
| Bothy shelter | Lightweight, waterproof and easy to erect Not ideal for sleeping Can contain all group members (depending on size) |
| Bivvy bag | Lightweight, water proof, no erection required Single occupant only Difficult to use in the rain |
| Lightweight tarp | Lightweight, water proof, more difficult to erect Can be used with snow pits and lean-tos |
| Lean-to | Natural materials required to build Time consuming to build Difficult to make waterproof without a tarp |
| Snow pit | Quick and easy to build Tarp or emergency blanket(s) needed for roof Confined space and may be draughty |
| Snow shelter | More time consuming to build than a snow pit Tarp or emergency blanket(s) needed for roof More suitable for groups than a snow pit Not suitable for conditions above 0C |
See also
- Snow camping includes information on snow caves and igloos