

Reading Time: 7 minutes
Many people think that there could be few experiences less enticing than camping in the snow. However, snow walking, snow shoeing, ski touring, backcountry snowboarding and snow camping are popular among outdoor enthusiasts.
For a group to enjoy these activities safely and with some degree of comfort, all members must be well equipped and have a sound knowledge of overnight bushwalking and camping skills.
The basics for snow camping are almost the same as for bush camping, the major difference being the higher standard of equipment and knowledge required. There are a number of ‘tricks of the trade’ which can make a big difference to the safety and comfort levels when snow camping.
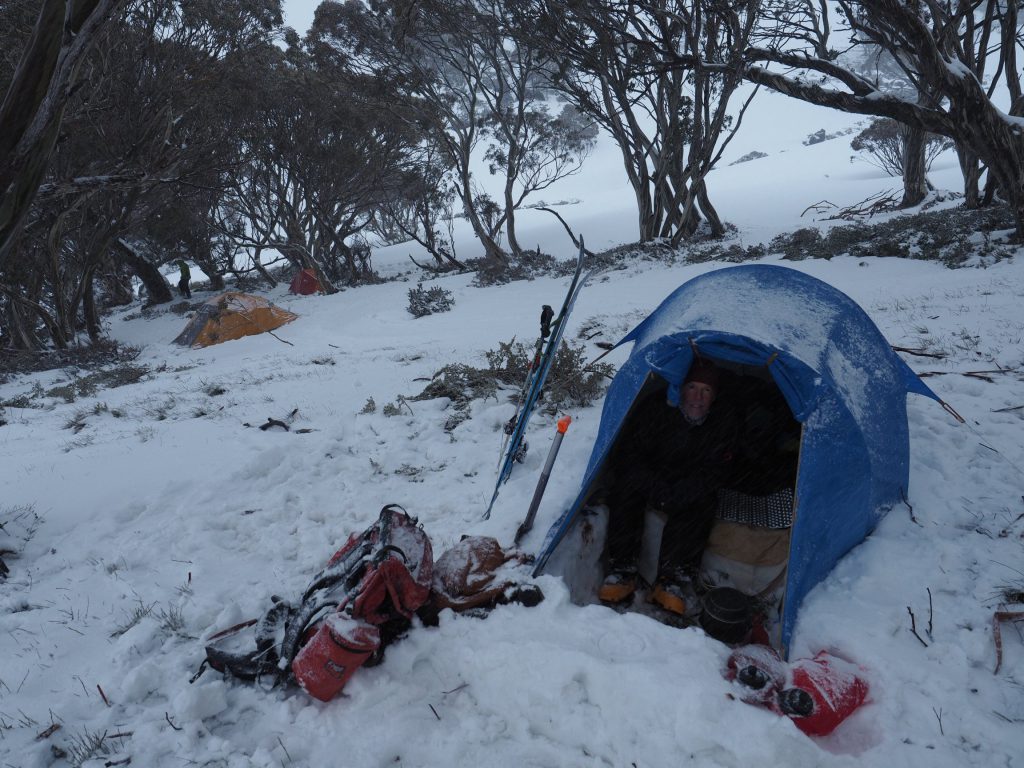
Pitching tents
If snow cover is thin, it may be easier and more comfortable to scrape off what snow there is and camp on the ground, especially if rain is forecast.
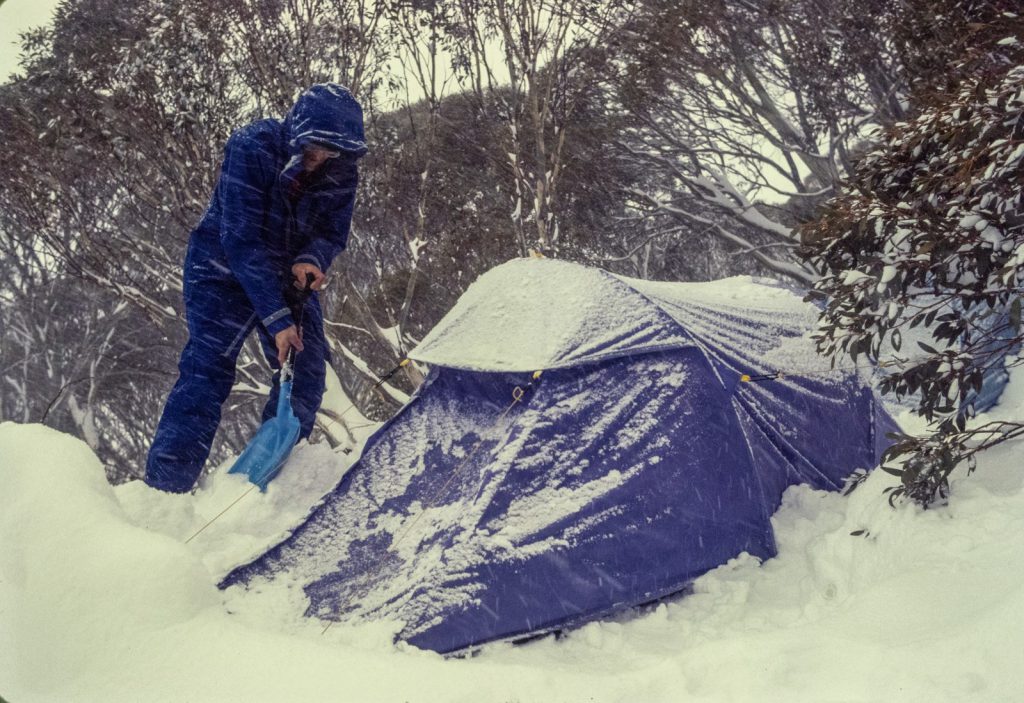
Preparing the site
- Select a sheltered campsite; avoid being under snow-laden trees and cornices.
- Probe the ground to ensure there are no unstable bushes or a creek below.
- Compact the snow by trampling down and moving snow until it forms a hard, level platform. Trampling is best done in boots, as skis do not generally give enough pressure to compress snow effectively.
- Smooth off the site; best done using skis to scrape the surface.
Putting up the tent
- Lay the tent out with the back of the tent into the wind, preferably with the door facing across or down the hill, as cold air travels down hill and should go around the tent, not into it.
- Peg down the base of the tent using snow pegs or dead sticks that are 30-40 cm long. Snow pegs save time and environmental damage.
- Loop snow pegs or sticks into the cords* that are attached to the bottom eyelets, push the pegs into the snow, and pack the snow down by stamping.
- A protective block of snow placed over each peg can reduce the effect of melting during the day, freezing-in at night or washing out if it rains.
- The roof guys and tent-pole guys are tied or looped to snow pegs or dead sticks that are 60-80 cm long and the sticks driven into the snow. Leave about 25 cm of stick out of the snow as this makes it easier to pull them out when the tent is taken down. Before leaving the site these sticks should be scattered to remove any trace of a tent having been pitched.
*These cords, about 50 cm long, should be attached to all the points on the tent normally secured by pegs. If the sticks get frozen in, and usually everything freezes overnight, the cord can be untied or cut and the tent removed. Then there is plenty of room for the pegs or sticks to be removed using boots, a snow shovel or similar tool, without the risk of damaging the tent.

After the tent is pitched
- If it rains, check the pegs regularly as they can easily be washed out. This may mean getting up during the night if the rain is heavy and consistent.
- If it snows make sure the snow is knocked off the tent regularly or the tent can collapse under the weight. Keep the doorway clear to ensure an adequate flow of fresh air.
- Always try to keep the inner tent dry. This may mean laying the fly over and putting the two up together, or pitching the fly first which is possible with some tents. Take an extra sponge or synthetic cloth to mop up any snow or water getting into the tent.
- If the snow is deep enough, a knee deep foot well can be dug in the tent vestibule to help get into and out of the tent. This must be filled in before leaving the campsite.
- If the wind changes or it is not possible to camp out of the wind, a barrier can be constructed around the tent using snow blocks. This should be broken down and holes filled before leaving the site.
- In fine weather, even a communal dining area can be constructed by digging seats around a central snow block. Any excavations must be filled in before departure.
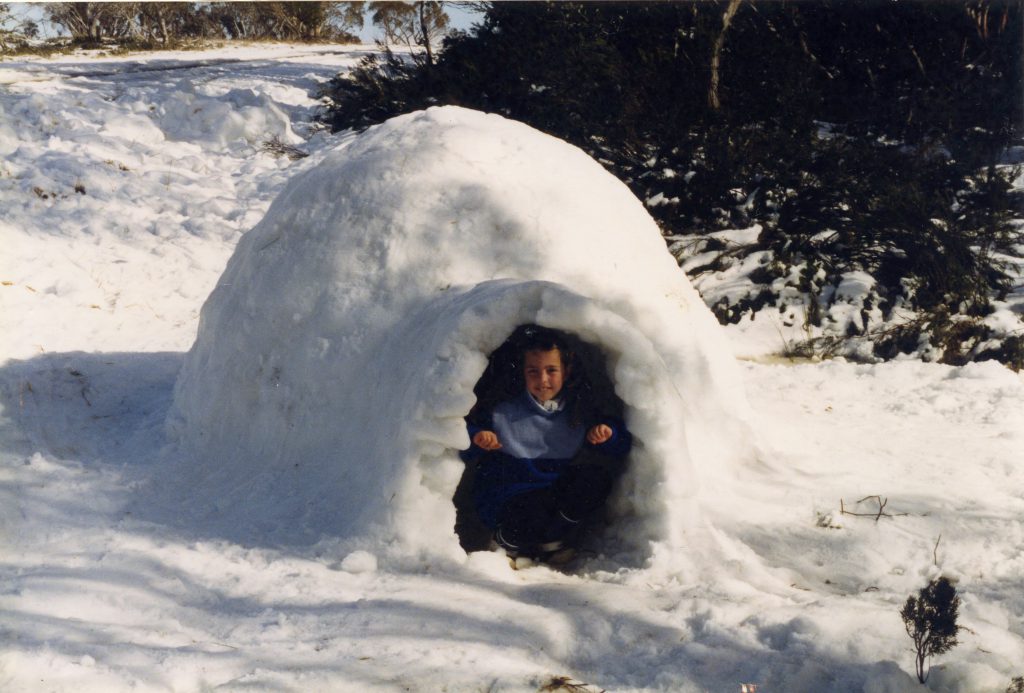
Snow caves
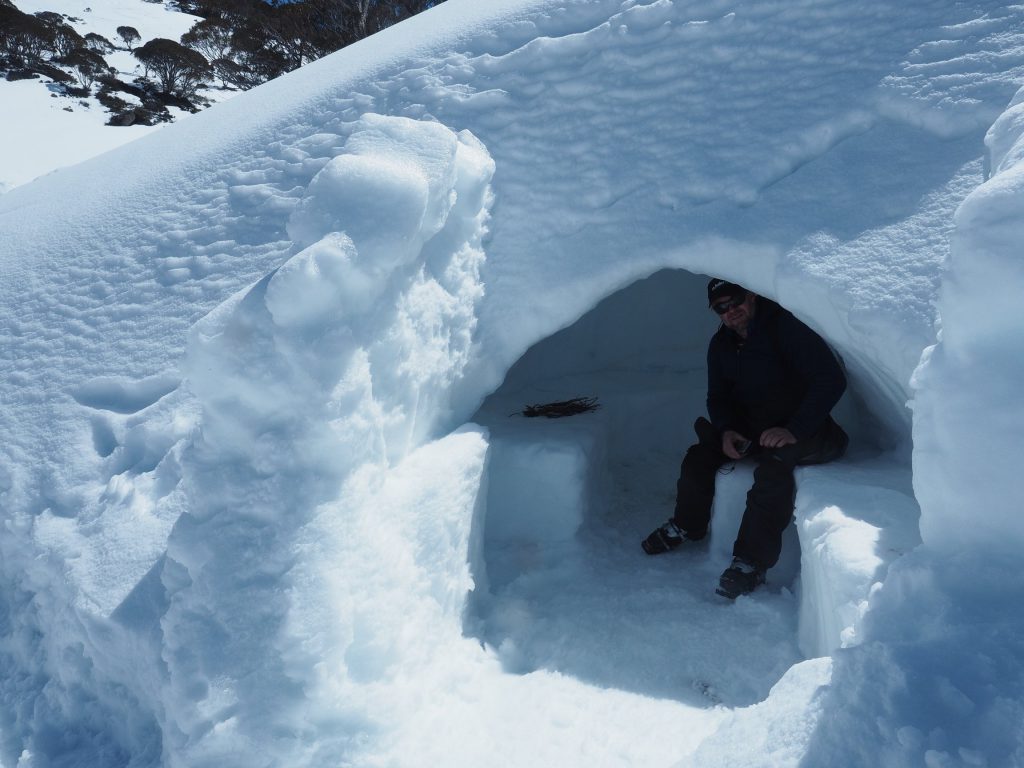
Digging a cave in a deep bank of snow can produce a comfortable and secure living space if conditions are ideal.
However, in bad weather or unstable snowpack, snow caves can be a very dangerous. In 1999 a group of snowboarders died in a snow cave they had dug , near Mt. Kosciuszko, New South Wales. If heavy rain is forecast, building a snow cave should not be attempted.
All things considered, a good snow tent, pitched in a sheltered site or with windbreak walls built around it is generally a safer shelter than a snow cave or igloo.
Carefully select a suitable location for a snow cave. A good location has:
- shelter from prevailing weather (e.g. a lee slope)
- a good depth of snow (confirm by probing)
- a slope with an angle (makes excavation easier)
- a safe runout below
Do not dig a snow cave:
- in a flat location where snow will accumulate (deposition zone)
- underneath or near any cornices
- on an avalanche prone slope
If unable to assess the above hazards do not attempt to build a snow cave.
Constructing a snow cave
- Dig a horizontal entry tunnel on a slope in a drift
- When in about 600-900 mm, start digging the cave upwards and out on each side
- Construct sleeping benches higher than the cave floor
- One person should dig the cave inside, while another will be needed to clear the entry tunnel of snow from the cave.
- The floor of the cave should be above the top of the entry tunnel, so cold air cannot drain in.
- Smooth the roof very carefully into a dome. Any low points or bumps may drip.
- Make a ventilation hole in the roof with a ski pole.
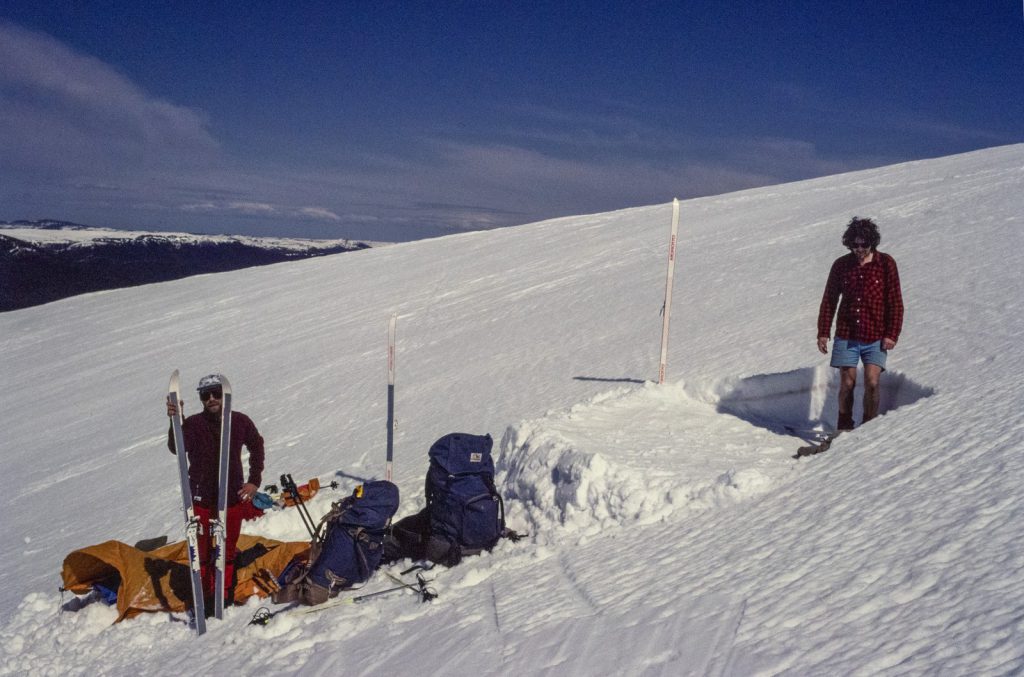
Skis should be placed upright in the snow just outside the cave to indicate its location.
Snow cave construction is very hot, very wet work so good waterproof jackets, overpants and mittens are essential.
Safety considerations with snow caves
Groups should be aware of some serious risks associated with snow caving:
- If the cave is made too large or the snow is soft and wet, the roof may collapse.
- If any cooking is done in the cave good ventilation must be provided, with the entrance lower than the sleeping platform and a vent hole to permit exit of steam and carbon dioxide and carbon monoxide.
- If fresh snow fall or the wind is blowing drift snow around, it is highly likely that the cave entrance will be blocked with snow – keep it clear.
- Regular checks during the night are essential. Keep a ski pole or other suitable tool inside the cave to create air holes in the roof if needed.
- A slab avalanche can cause catastrophic failure of a snow cave.
- An avalanche from above can bury the snow cave and its entrance. This risk may increase if further snow falls.
Igloos
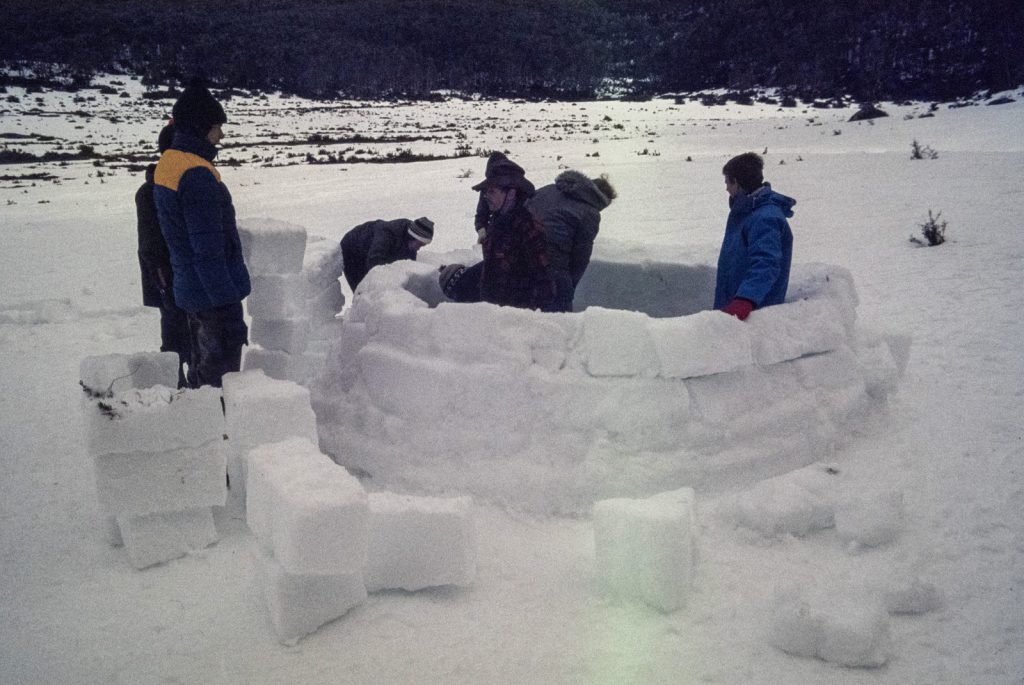
Igloos can only be constructed using consolidated, old snow and there needs to be a significant area of snowpack available. Building an igloo also takes a considerable amount of time, but may be an enjoyable afternoon group activity.
Commence by marking out a circle of the diameter required on flat ground – about 2.5 m is a minimum, but 4 to 5 m will accommodate up to five or six people. Cut blocks of snow about 300 × 300 × 600 mm long, and lay them outside the circle. Cut the blocks from outside the igloo – do not lower the floor level, as cold air will drain in. Igloos are built as a spiral, and the door is cut at the end.
After laying, the first layer of blocks must be cut to form the base of the spiral, by trimming them so that the top slopes inwards, with the height increasing smoothly and gradually from ground level to the full height of the block by the end of the layer.
Continue laying blocks around the spiral, always leaning them inwards. The last block will be round and conical – like a cork from a large jar. The door is cut next to last, and then a protective tunnel can be built. Once inside, smooth the inside very carefully, as any low points will drip. Any cracks should be filled with snow from the outside.
A snow shovel, a pruning saw or a plywood platform used to support a stove could be used to help build or cut blocks. Snow construction can be hot work, so don’t forget to drink while working.